First things first… #
As a Contributor to Protoweb, you must adhere to Protoweb Content Standards and agree to the terms and conditions of the User Agreement.
Quick Links #
- Development Portal (appserv.protoweb.org)
- How to use the Development Portal
- Content Guidelines
You Will Need #
- Discord (for communication with @Administrators and volunteers with the @Mentor role, see bottom of page for link to our Discord server).
- Knowledge of HTML code, some knowledge of Javascript, Bash and/or PHP scripting
- Able to run the RetroZilla web browser on your primary computer for testing.
- Optional: other classic web browsers to test recovered websites. We recommend having access to Netscape 3.0 and Netscape 4.x and Internet Explorer 4 or 5. If you do not have a computer to run these browsers, you can download the PCem emulator image we created, that has all the browsers preinstalled.
Create account #
- First create your user account at https://protoweb.org/register/. To register, you first will need to contact an @Administrator on Discord for an authorization key. Once you have the authorization key, click on Register on the top of this page. Use the authorization key when asked. Your username on Protoweb should be the same as your nickname on Discord. Once you have created the user account on Protoweb, the username cannot be changed. Your account on the website allows you to write blog posts on restored web sites.
- Once registered on the website, you will need to create an account for the Development Portal. Go to appserv.protoweb.org/newuser.php and type in the same username and password. If your account was approved, you will have received another authorization key in a separate email for the development portal.
- Let a @Administrator know that you have completed registration on both websites so they can add you the @Volunteers role.
- Now you have created logins for the Website and the Development Portal and the Development Proxy Server. Congratulations!
Discord #
Our Discord server’s #admin-chat is the place to ask for information regarding site restorations. We are happy to guide you through the process of restoring sites and give information on the technical aspects of the Protoweb proxy servers so you can start building web applications.
Important: As a contributor, your Discord nickname should always reflect the username you set up on Protoweb in order to ensure your access privileges and roles on Discord are retained. Please make sure your nickname on the Protoweb Discord server reflects your actual Protoweb username, or have your Protoweb username denoted in another way along with your Discord nickname. Please remember that we cannot rename your user account on Protoweb once it has been created. The only way to rename it is by removing your old user account and creating a new one.
Website access #
This website allows you to customize your user profile, write blog posts and edit pages.
- Click Login at the top of this page, and use your website credentials.
- If you are able to log on, your account has been created and your account is successfully approved.
Development portal access #
The development portal allows you to create new restoration projects as well as work on current projects. It also allows you to publish projects once they are completed. The development portal can also be used to modify pre-existing websites. The @Administrators will be able to assist with access requests.
- Open appserv.protoweb.org
- Log in with your username and password.
- If you are able to log on, your account is now working with the development portal and you will be able to start creating restoration projects.
- For more information on how to use the Development Portal, see this article.
Using the development proxy server #
The development proxy server is used to preview and test the websites you are working on. It will also automatically download missing resources from Internet Archive, if pages were missing from your initial archival attempt. It will also highlight missing images for you and in the case of file downloads it will try to locate alternate downloads if it can’t find them from the Internet Archive.
- Log into Development Portal. Once you have logged in, you can start using the Development proxy server. Logging on to the Development Portal updates your IP in our firewall, and will hence enable access to the development proxy server.
- If you haven’t done so already, install the web browser you will use for testing. For a modern Windows computer, we recommend installing RetroZilla (Protoweb edition), or using a emulator with a suite of web browsers, such as the Windows 98 Protoweb installation available here. You can also use a vintage computer to test with real hardware. In this case we usually recommend Internet Explorer 5.x and Netscape Navigator 4.79. Both browser installation files can be obtained from Protoweb.
- Run the browser, and set your proxy parameters as follows:
- HTTP proxy: wayback.protoweb.org, Port 27851
- FTP proxy: wayback.protoweb.org, Port 27851
- Gopher proxy: wayback.protoweb.org, Port 27851
- This will set the proxy server to the development server, so you can use the advanced features that the development server offers.
Note! If you receive the error “401 – Unauthorized“, it means your IP address has probably changed or you are using a VPN and the server no longer recognizes your connection attempts. Please login again to the development portal to update your IP address. If you are using a VPN, in some cases you may need to disconnect from the VPN, then try logging on to the Development Portal and then try again.
Using the development proxy server with the Protoweb Browser #
The Protoweb Browser Pre Rel 5 and later can connect to the development proxy server. To do this, you need to run the Protoweb Browser executable with the -dev switch, specifying the full proxy address of the development proxy server. Currently, this would be -dev wayback.protoweb.org:27851. This can be done in one of two ways. The first way is from the command line. Open a command window in the path of the Protoweb Browser executable file. Type the name of the Protoweb Browser executable and a space, then add -dev wayback.protoweb.org:27851 to the end. Press the enter key and Protoweb Browser will open and connect to the development proxy server. The second way is to create a new shortcut to the Protoweb Browser. Right click the newly created shortcut and click Properties. Add -dev wayback.protoweb.org:27851 to the end of the path in the Target box in the shortcut properties. When you run Protoweb Browser using this shortcut, it will connect to the development proxy server.
How to add new web sites to Protoweb #
The standard workflow is as follows:
- Decide which website you’d like to archive. Follow the Content Guidelines to determine if the website you are planning to restore fits our guidelines. If you are unsure, feel free to contact an @Administrator or a volunteer with the @Mentor role. They are always happy to help you get started!
- Go to the Internet Archive Wayback Machine (opens in new tab) and type in a web site name. You will be presented by the Wayback Machine’s Timeline. Browse the timeline to track down a good copy of a website domain. You will need to find a home page with the least amount of broken links, missing pictures, and other artifacts. Write down the timestamp of the website copy you’ve chosen. You will use it as the basis for the mirror operation of the Protoweb archiver.
- Open the Site Rebuilder’s Toolbox (see Wiki manual on this site for in-depth instructions) and select “Archive web site”.
- If, for some reason you are having trouble opening the portal website, please refer to the Wiki manual for troubleshooting steps.
- Under Domain Name to Save type in the website domain in the format “www.example.com“.
- Under Targeted Date, type in the timestamp you had noted earlier in step 2.
- Under Link Traversal Depth, select a link depth that is realistic for the website. For example, if it’s a large website, with relevant pages 6 links deep starting from the home page, you will select 6. This will mirror all pages up to 6 links deep starting from the home page. It could take days to complete with higher values, so always choose an appropriate depth for the website you are mirroring. Usually the default 6 is fine for most sites. If the website has an initial landing page or a “welcome” page with just one link to enter the main site, you may add +1 to the depth value of your choice.
- Click Start Archiver. If everything checks out, this will start a job on the server which mirrors the given domain at the given timestamp from the Internet Archive.
- During the mirror process, you will see your page appear under “Running Jobs“.
- Once archiving is completed, you will see it appear under “My Sites in Development“.
- If the archive job failed for whatever reason, feel free to delete it and start over.
- Your website is not yet publicly available. It will be when you publish the site, once you are ready to do so – see below.
How to edit the imported web site #
The standard workflow is as follows:
- Once you have mirrored a web site, it will appear as a line under “My Sites in Development“. You are now ready to start editing and repairing the mirrored web site. Next to your completed archival job, you will see the “Edit” button. This button takes you to the File Manager so you access the files of the web site.
- The File Manager allows you to copy, move, create new files and edit files in place. It has an advanced Syntax Highlighting text editor and recognizes several programming languages. The File Manager supports file compression and bulk operations.
- Any changes you make can be immediately previewed using the Development Proxy Server, as long as you have set it up (see above section). The Development Proxy Server works just like all the other production proxy servers, with a couple of notable differences:
- The development server allows full access to browse an unpublished web site. The regular servers do not allow browsing unpublished web sites.
- The development server provides more information on the nature of errors your web site might encounter. This is useful for debugging your site.
- To further aid debugging, you will have access to the server logs. To access these, go to the iNode gateway and click Server Stats, then Development Debug Log.
- The development server does not throttle download speeds.
- When you are browsing your site, and you encounter a page or image that is missing, the development server will try to locate and download the missing document from the Internet Archive on the fly. This may be useful if you are validating the links on a page and notice missing pages – automatic downloading from Internet Archive assists you so you do not have to manually upload the missing file using the File Manager.
- The development server can also source missing files from an internal file repository.
- When testing your site, the development server highlights missing images with an ugly pink image so it is readily apparent what images are missing or broken.
- Use the File Manager and RetroZilla together to adjust, repair and fix a web site. Pay close attention to broken links and missing images. If a link leads to another domain, you can leave the link as is. If that website gets restored in the future, your link to the domain should start working again.
How to restore and publish your web site #
The standard workflow is as follows:
- If you are new, it is always good idea to contact the @Administrators or @Mentors on Discord to let them know of the website you are planning to restore. They will help you identify possible issues (if any) before getting too involved with a website restoration.
- When you have completed restoring a website, contact one of the @Administrators or @Mentors to assess your website restoration. This way you can avoid any potential issues that could be addressed ahead of publishing your site. @Administrators and volunteers with the @Mentors role will be happy to offer guidance on what issues to fix, and how to fix them. They will also give step by step instructions on how to tackle some of the more complicated issues you may encounter with your website projects! Feel free to reach out!
- When you think your website is ready, give it one final glance. Make sure there are no broken links or missing images on the site itself. If a link leads to another domain (an external site), you should leave the link as-is, since that website may be restored in the future, which will then ideally restore the link to working status. If you are unable to fix certain pages or images, you might opt to comment out links to missing pages and images. Again, if the broken link leads to another domain from the site you are restoring, you can leave the link as is. Only if the link on the page relates to your site, will you try to fix it, or comment it out, if it is unfixable. If you are unsure how to proceed on some particulars, you can always ask for assistance in the #admin-chat channel on Discord. @Administrators and volunteers with the @Mentor role will be happy to check your site restoration with you and give you guidance and feedback to help you verify your site is ready to be published.
- Once you have checked the website and it is greenlit by an @Administrator or a @Mentor, write a Protoblog entry about your website. You can write anything from a short to a long entry. Try to at least give a general description of the site. If you want, you can also elaborate with more pictures, what the site means to you, what hurdles you overcame, some of it’s notable features, and the pages on it that you think might be interesting. Users of Protoweb will be happy to read about what pages are coming online, and will allow the @Administrators to make a new site announcement on social media, such as the #announcements Discord channel and the Protoweb User Group on Facebook.
- Once you are done with the site and have written a ProtoBlog entry, you can return back to the Development Portal list of pages. If you are a new team member, ask an admin to publish your page. If you have given publish rights, then you can click on the Publish button. Once you click the button, and after a confirming, the website will be marked published, and be viewable by everyone immediately on Protoweb.
- Regardless whether you published the site yourself or not, please remember to let admins know that you have published a website! Right now, only @Administrators have access to add sites to the site index on the iNode website directory. They will also add it to search indexing so it appears in search results, and they will also announce your new publication to all Protoweb users on social media.
How to create a Protoblog post #
Once you have published a website, we ask you to write something about the website you restored and your work restoring the site. This not only provides you a platform to let others know of the aspects of your work and care put into restoring the website, it also serves as an announcement to the community that a new website is available on Protoweb, so that others will know and visit the site.
- First log on to Protoweb’s website using the link at the top of the page.
- When logged on, you should see a Contributor action menu on the top of the page.

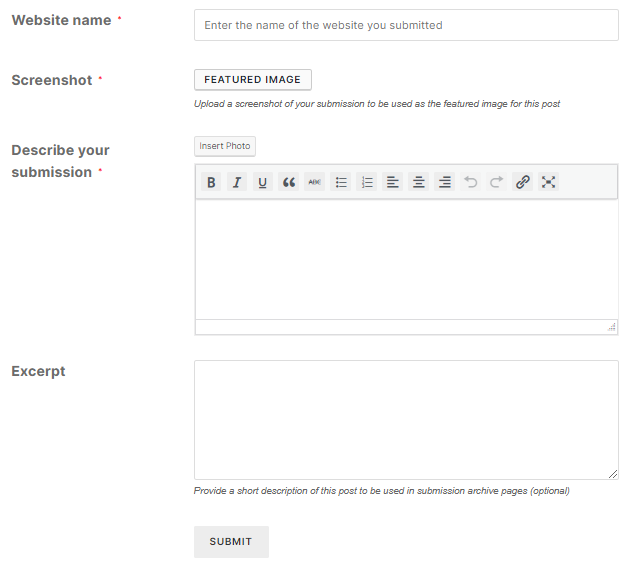
- Now you can choose to submit a contribution which will open up a form where you can type in a freeform article about your web site restoration.

- From here, you can type up your article. To upload more than one image, first select a featured image of the website, then under the text editor you’ll be able to paste more pictures if needed.
Questions Answered #
Q: How do I know if my job has completed or failed?
A: You can view running jobs in the Development Portal, and looking at the job logs of your project will usually indicate if a failure has occurred. You can also delete a running job. If you made an error, you can delete the running job and start over.
Q: What if a recovered site is broken?
A: This depends. If the page is too far gone, and you cannot reconstruct the start page, we recommend you delete the site and find an alternative date with less broken links or images. If most of the pages are fine, you can fix some problems on a site manually, and missing graphics can be reconstructed. Sometimes you may find a file or a graphic that is missing but an alternative resource on archive.org or somewhere else on the net is available. In this case you can use the Upload URL feature in the File Manager which fetches a file from the Internet to the directory you specify. If portions of the website are not available anywhere, the links leading to broken areas of the websites may be commented out, so that the user is not presented with broken links. Do leave the HTML code in though, but comment it out. The hope is that eventually some broken areas can be restored with new restoration techniques.
Q: How do I remove a link to a broken page?
A: Best not to modify original source code. But you can comment out portions of the page that lead to unrecoverable pages. If it’s a inline text link, then commenting out the link and leaving the text is a good option. If it’s a link on a specific menu item, then commenting out the menu item (link and text) entirely should be done, since the link doesn’t need to advertise the option to a page that cannot be accessed. If the link is on an image, and it is important to preserve the image for style, then comment out the link but leave the image.
Q: How do I comment out a link?
A: You will usually see a snippet like this around a link: <a href="/url/to/page.html"></a>Link to page</a>
1) if you want to retain the text, then comment out the A tags like so: <!-- <a href="/url/to/page.html"> -->Link to page<!-- </a> -->
2) if you want to remove link and text, comment out like so:<!-- <a href="/url/to/page.html">Link to page</a> -->
Q: In the logs, it looks like archiving has slowed down. Is it stuck?
A: Toward the end of a mirroring process, the archiver goes through a lot of files and links trying to find any files that it may have missed. This is probably what you are seeing. This is by design. Give it time – the process will complete eventually.
Q: I cannot access the web site I just crawled on the development server. The job is Complete, but I’m always getting a 500 server error!
A: The development server expects exact addresses. “www.site.com” is different than “site.com”. So make sure you are accessing the site with the URL you mirrored. In other words, if you mirrored “www.site.com”, then you will access the site as “www.site.com”. If you mirrored “site.com”, then you will access the site with “site.com”. Only after publishing, the redirects will be added, so “site.com” will go to the primary site “www.site.com” or vice versa.
Q: I prefer working on site files on my own computer with my own file editors. Is this possible?
A: Sure is! The file manager allows you to compress the entire website into a file which you can then download. Once you have archived a website, you will need go back to the job queue, click on “Edit” to access the File Manager. Inside the File Manager, you may easily compress a website into a zip-file by selecting all files and then choosing “Zip”. This will begin a process in the background and the file manager will be unavailable until the compression of files is done. Zipping may take a few minutes. Once the process is complete, the file will appear in the active directory. You may then download the zip-file and unzip it to your computer to work on the files. Once you are done, you can create another zip archive, upload it back to the server. Then inside the File Manager, open the archive you uploaded, and click UnZip. You do not need to zip up a site every time you make a change. You may also upload individual edited files if you prefer. If you’d like to test the site on your local computer, you may choose to use a locally running HTTP server, or you can upload files to the development server and test the site there.
Q: I would like to back up the site I crawled. Is that possible?
A: Yes, you can always back up your entire site, even after you fix and edit it. Just log on to the Site Rebuilder’s Toolbox, and on the desired website, go to it’s File Manager using the Edit button, select all files, and click on the ZIP or TAR buttons to create archives of the selected files. You can then download the archive to your computer.
Q: Can I capture specific URL‘s such as website subdirectories or specific files?
A: While this feature is planned to be added in the future, it is not currently available. If you need to add specific files to an existing site, you can upload them using the File Manager, or use the Upload URL feature in the file manager to upload a link to a working file. If you need further assistance, contact one of the @Administrators or @Mentors on Discord, and they will be able to modify the site files any way you need.